Friday, December 2, 2011

Holiday Buttercream Ribbon Cake


Much to my husband's dismay, I could literally spend days sitting in front of my computer, musing over the myriad of amazing cake/dessert blogs and web sites that feature the most clever tricks of the trade in producing culinary masterpieces that have everyone wondering...."how the heck did she do that?!!"

So, I am going to uncover a few of my jewels for you that I put a Holiday spin on that's perfect for an upcoming special event or gathering. I call it my Holiday Buttercream Ribbon Cake. The surprise is that as beautiful as it is on the outside, there awaits a very special surprise when you slice it for your guests....a red and white striped center that looks like a candy cane!

I will include the pictures of what I did to create this cake. However, for a more in depth explanation of the cake striping technique, I have attached a link to the most amazing website, My Cake School,  by the talented Melissa. I agree with her assessment to use a box cake mix (gasp!!) for this technique as the consistency of the cake batter has to be right for it to work. For mine I used Betty Crocker White cake.

As for the frosting, I use a recipe for Swiss meringue from Hindsight Bride or American buttercream from SavorySweetLife.com. Both work great. Just don't use the canned frosting from the grocery store, as it wont work for this design.

For the Buttercream ruffle affect, I have included a  Ruffle Tutorial  from the amazing Melody Brandon of My Sweet and Saucy. She owns a bakery in Long Beach, CA that is fabulous and she is a true cake artist. She inspires me every day with her amazing creations! I have also included the steps of how I arrived at my design as well. Here is what you should have on hand depending on which recipe you choose for your cake and frosting.

INGREDIENTS:

  • 2 boxes White Cake Mix/baked per the My Cake School Instructions-I find that extra batter is necessary to accomplish enough striping.
  • Red Food Coloring
  • Eggs
  • Whole Milk or heavy cream
  • Vegetable Oil
  • Water
  • Confectioner Sugar
  • Salt
  • Vanilla
  • Unsalted butter-softened

EQUIPMENT:

Q2 8" cake pans
Q2 Petal Decorating Tips (you can find these at Michaels Crafts or any cake decorating supply store)
Q2 Large Icing bags
Q1 cake board or plate
mixer with wire whip attachment
measuring cups and spoons

So, below are the picture of the cake that I did with Red and White Batter with the My Cake School Method found HERE


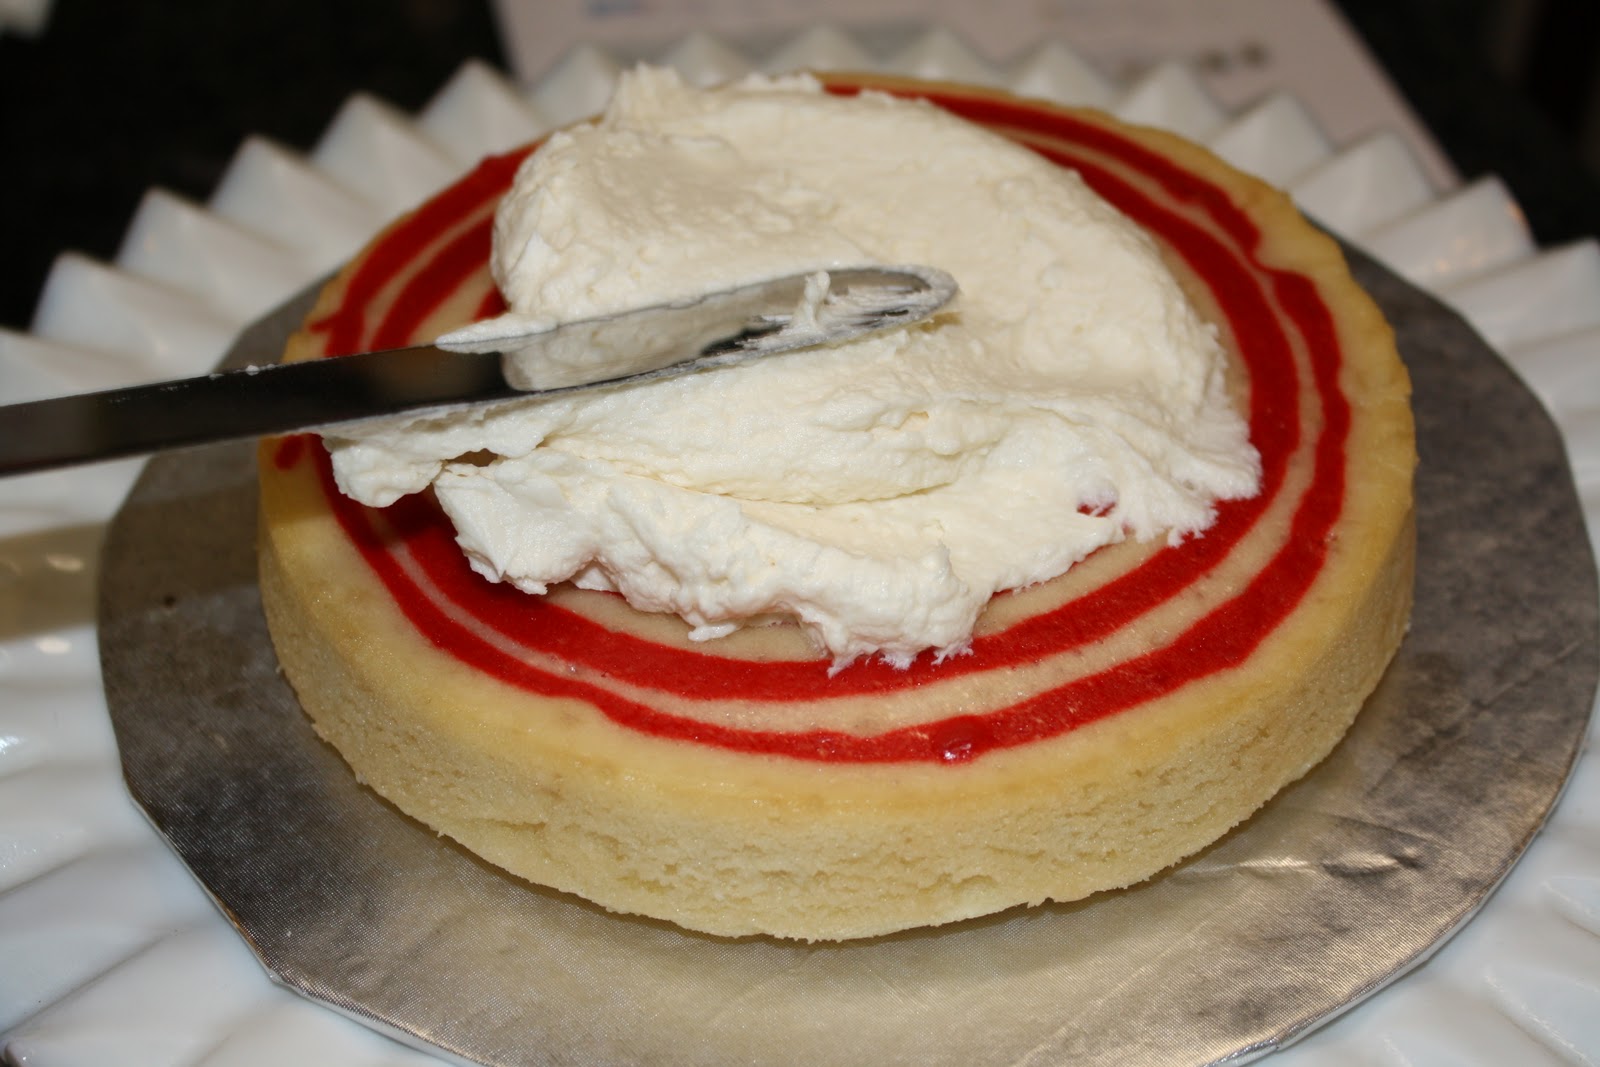
After you have finished crumb coating the cake, place it in the fridge for 15 minutes to set up


BUTTERCREAM RIBBONS


Make sure you have all of your equipment layed out and ready to go. You will need a batch of either swiss meringue or american buttercream. You will also need your 2 pastry bags and 2 petal tips.


I put my pastry bags in large glasses to make filling them with icing easier

THE TECHNIQUE

Next, you need to place  petal tips in each of your pastry bags and fill one with red icing and one with white. Get your cake out of the fridge and follow the tutorial below on how to proceed with making the buttercream ribbons


I have also included some pictures of my own design below for reference:


And here is what you should end up with when you are finished! Make sure to chill the cake for at least another hour before slicing!


Time to dig in and enjoy the fruits of your labor!


Wednesday, November 30, 2011

Chocolate Chunk Candy Cane Cheescake


When I ran across this recipe on the Internet, my heart stopped just at the title! Chocolate Chunk Candy Cane Cheesecake! In my book, anything that combines chocolate, peppermint and cheesecake has surely got to be a winner. And now, I can confirm, after giving the recipe a trial run, that this is unequivocally the BEST holiday dessert you could ever dream of serving your friends and family. Not only is is a showstopper, but it is easy to prepare and amazingly delicious! Here is what you will need:


INGREDIENTS-adapted from  myrecipes.com:


I am seriously addicted to these cookies! Cool Mint Oreos ROCK!
  • 1-1/2 cups chocolate wafer cookie crumbs (about 32 cookies)--I used the Oreo Mint cookies that are out now for the holidays and it really gave the crust a extra punch of mint. I used the entire package
  • 1/4 cup butter, melted
  • 2 tablespoons sugar
  • 4 (8oz) packages of cream cheese softened
  • 1 (14oz) can sweetened condensed milk
  • 1/3 cup heavy whipping cream
  • 1/4 cup sugar
  • 2 tablespoons all purpose flour
  • 2 teaspoons vanilla extract---I usually throw in a couple additional teaspoons because I LOVE vanilla!
  • 3 large eggs
  • 1-1/2  cups semisweet chocolate chunks-I use Nestle
  • 1/2-3/4 cup coarsely crushed hard peppermint candies (about 24)-I found some pre crushed peppermint candy in a bottle at Marshalls. I have also seen this product at World Market
  • 1 cup heavy whipping cream
  • 2 cups semisweet chocolate morsels (I use Ghirardelli)
  • Garnish: 65 medium sized candy cane sticks-I bought 3 boxes (24 ea.) at Big Lots for $2 a box. I had to trim off the rounded tops and I cut half of them 3/4" shorter so I had a variety of heights

    PREPARATION:
    Preheat oven to 325 degrees and lightly grease a 9" springform pan.  Place cookies in food processor and blend until fine crumb is present and fully blended.


Combine cookie crumbs, melted butter and sugar and stir well. Press mixture on bottom and press up the sides of the pan about 3/4" and press bottom so crust is equally distributed. Place on wire rack with baking pan below for 14 minutes. Let cool.
                                                  

Beat cream cheese at medium-high speed with an electric mixer until creamy. Gradually add sweetened condensed milk, beating just until blended. Add 1/3 cup whipping cream and next 3 ingredients. Beat until just blended. Add eggs, 1 at a time, beating just until yellow disappears. Stir in chocolate chunks and half of the crushed candies.


Pour Batter into baked crust. Bake at 325 degrees for at least 55 minutes or until edges are set and and center is almost set. NOTE: The cheesecake may still giggle a little but this is OK. Don't over bake!. Turn the oven off. Immediately run a knife around edge of pan, releasing sides. With oven door slightly open, let cheesecake stand in oven for 1 hour. Remove from oven and cool completely on wire rack. Cover and chill for 8 hours. Remove sides and bottom of pan.


For garnish: Pour 1 cup heavy whipping cream in microwave safe bowl. Microwave on HIGH 1 minute or until  hot. Add 2 cups semi sweet morsels. Let sit for about a minute and then still until chocolate melts and mixture is smooth.


Put a layer of wax paper under a wire rack and place the cheesecake on top of the rack. Pour the ganache mixture over the chilled cheesecake, starting in the center and allowing the ganache to spill over the edges.


Smooth the edges that did not get covered with an offset spatula. Allow a few minutes to set up.


Then, take candy cane sticks and place around the diameter of the cheesecake. I cut half of them down about 3/4" and alternated tall vs. short candy canes for a more stylized look. Sprinkle the remaining crushed peppermints on the top. Place back in fridge until chocolate has set up. When ready to serve allow to sit out at room temp for about 10 minutes.


Now place your masterpiece on a beautiful cake pedestal. Slice and serve, and prepare to be called a domestic Goddess or God and receive lots of accolades!!


SO YUMMY!