 |
| Pecan Praline Sauce |
What if I told you all you needed to create the perfect holiday or hostess gift was 30 minutes of your time, 7 ingredients and a microwave. Yes, you can not only create edible liquid gold in a flash, but you will also be revered for you culinary prowess and held on a pedestal for providing a jar of bliss that will have your friends and family swooning. In fact be prepared to make extra because they will be coming back for more.!This amazing sauce can used as a topping for cheesecake or bread pudding, or served with sliced apples as a dip. You can also just eat int straight out of the jar with a spoon! My favorite use, however is this...........................

Pecan Praline Sauce heated and served over vanilla bean ice cream!!
- Q2 medium sized Micro safe bowls (one with a lip for pouring)
- 1 package of pecans (1-1/4 cup)-lightly toasted
- 8 tablespoons unsalted butter
- 1-1/2 cup light brown sugar
- 3 tablespoons all purpose flour
- 3/4 cup light corn syrup
- 1 tablespoon high quality vanilla (not imitation!)
- 2/3 cup evaporated milk
Makes about 4 cups of sauce
Directions:
Pre heat the oven to 425 and place a cookie sheet with pecans in upper 1/3 of oven. Toast 2-5 minutes or until golden brown. Set a timer for this! Don't walk away and keep an eye on them at all times. Depending on your oven temp it may take more or less time and they can burn quickly!!
Let pecans cool and then coarsely chop....leaving some whole
In micro safe bowl (without spout) put toasted pecans and 4 tablespoons butter in micro wave and cook for 5 minutes, stirring once in between.
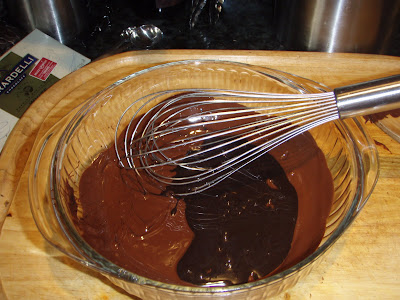
In micro safe bowl (with spout) place remaining butter. Micro wave until melted (about 1min.). Add brown sugar, flour and corn syrup. Stir with whisk till blended. Cook in microwave on high for 5 minutes (or until there is no sugar grains left). Stir once in between cooking time.
Add 1 tablespoon high quality vanilla (not imitation!) and add the 2/3 cup evaporated milk. Stir this until all ingredients are mixed evenly
Pour into 8 oz mason jars allowing the pecan portion to be distributed evenly in all jars. Let sauce cool. After cooling, the pecans will rise to the top of the jar. Stir the sauce, mixing the pecans back in the middle. Place lid on jar and decorate as desired. I doubled the recipe twice and got Q12, 8 oz jars.
 |
If you are giving this away as a gift I would suggest putting a label on it indicating that refrigeration is required. Not that I think this is possible due to it's deliciousness and the fact it will disappear immediately, but I am told that it will last up to 4 months if refrigerated.
ENJOY!


 ENJOY THIS FABULOUS DESSERT!!!


