I started a new job about a month ago. Most of my employees have heard that I love to bake, however, I have yet to bring in any goodies for them to taste. As luck would have it, one of my employees, Peter, was celebrating a major milestone birthday on Friday of last week. I had to WOW my peeps and bring in the big guns, so I headed to one of my favorite spots, Bakerella.com. For those of you who are not aware of her many talents, she is amazing and has some of the most clever ideas. And there it was in all its splendor, the 14 Layer Cake. Bakerella also happens to take magnificent pictures with her very spectacular camera. And while the pictures from my camera are not nearly as nice I think I did well in the creation and taste department. The recipe was ambitious, but the results were OVER THE MOON! Everyone LOVED the cake and I think it was a home run. If you are looking for something special to impress someone, this is IT!

The Ingredients for this cake are fairly basic. I use Ghiradelli unsweetened cocoa powder and Land O Lakes Unsweetened butter. I think that premium ingredients make for a better tasting cake. I also use a premium madagascar/tahitian vanilla. Make sure to bring your eggs and butter to room temp before mixing. You will also need to purchase 14 aluminum cake tins from your local grocery store, parchment paper, and a cake board. You will also need a jellyroll pan and cake rack. I used a 12-layer cake recipe that BAKERELLA posted. that gets divided into 14 cake pans. Here is the recipe: 12layercake(thatmakes14)

Preheat your oven to 350 degrees (the recipe says 375 but 350 is better). You need to cut 14 sheets of parchment paper, staple them together and cut out circles the same size as the bottom of the pan. I used a flour based non stick cooking spray and coated the bottom of the pans first, then put down the parchment circle, then sprayed the top and sides one more time prior to placing in the batter. If you don't do this step you run the risk of the layers sticking to the pans. Once you have mixed the batter, you will place 2/3 cup in each pan and spread with spatula until even. You should be able to bake 4 cakes at a time for 12 minutes. Look to see if the cake is slightly separating from the edge for doneness. It will take about an 45 mintues bake time to finish all your layers.
When the cakes come out of the oven, make sure to let them sit in the pan for a moment then flip out onto a cooling rack. Remove the parchment and let cool. While this is taking place, you can make the frosting. Then, after the icing has cooled and not yet hardened you can start spreading a little on top of each layer of cooled cake. Before you start, place your first layer on the cake board and place on your wire rack(over top of the jelly roll pan). This will catch all the icing that drips off. Continue to place another cake layer and repeat process until you have finished. You are going to look at this and say "What a mess!" but I promise it will turn out beautiful in the end!

Once you have placed the last cake on the top you can pour the remaining icing on the top and smooth on the sides. You may also need to take the icing that has dripped onto the jellyroll pan and place that on the cake as well.

At this point, I would place the cake in the fridge to harden a bit before you put on the last frosting layer. While the cake is in the fridge for a least an hour you can make the Dark Chocolate Buttercream frosing. Here is the recipe for that:
- 1/2 cup butter, softened to room temperature
- 8 oz. cream cheese, softened to room temperature
- 1/2 cup unsweetened cocoa powder (can use Hershey's Special Dark or light)
- 1 box (1lb.) confectioners sugar
- 1 tsp. vanilla
1-3 tbsp milk
Cream the butter and cream cheese with a mixer until smooth. Add the cocoa and vanilla. Then slowly add the sugar in small batches on low until combined, scraping down the sides after each addition. Add 1 tbsp of milk at a time until you get the desired consistency.
Once the cake is set you can apply the chocolate frosting on top. I used a pastry bag with a shell tip to add some additional pizazz. I also added some fresh strawberries for decoration. I would suggest placing the cake back in the fridge for another hour to set it up again. Make sure to bring the cake back to room temperature before serving for the best taste.
 Although this cake was somewhat time consuming it was worth all the ooohhhsss and ahhhhsss that I got when it was sliced and then eaten!


My employees absolutely LOVED this cake and it made me so happy that they enjoyed it so much. The best part is there was one piece left to take home to my very appreciative husband. Boy, was he happy about that!


 DOUBLE CREAM CHEESECAKE WITH CHERRY SOUR GLAZE
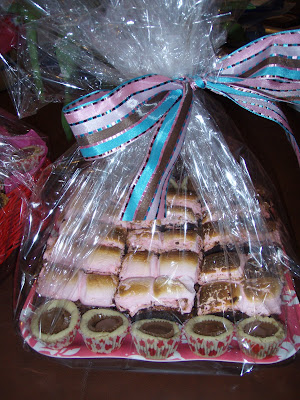
 Part II of the night was the s'more brownies that I brought. They are decadent and rich and were a hit with the kids. The recipe can be found on Food Network or here: S'morebrownies
 Part III was the Peanut Butter Cup Cookies that I brought along with the S'more Brownies. Everyone loves these cookies! I got this recipe from mybakingaddiciton.blogspot.com. This gal has some great recipes to try. These cookies are delicious and are a big favorite everywhere I take them! Here is the link to the recipe: PeanutButterCupCookies