Monday, January 18, 2010

Triple-Chocolate Mousse Cake


There is a cute little community market down the street from me in Birmingham, MI http://marketsquarestores.com/ (they are on twitter: @MarketSquareMI). They carry a large amount of grocery staples and wine/liquor and have an amazing deli and prepared food section. I usually shop there several times a week. While waiting in line a few days ago, I spied the magazine, The Best of America's Test Kitchen Recipes from Cook's Illustrated and The America's Test Kitchen TV Show. There was a picture on the front cover of the most beautiful slice of dessert. I scooped it up and added it to my purchases. Boy am I glad I did!! I have tried several of the recipes and all have been winners. My favorite so far is The Triple-Chocolate Mousse Cake. It is a tower of dark, milk and white chocolate that is a taste of heaven! It is smooth, creamy and decadent. It is not that difficult to make, just a little time consuming. However, it is well worth the time invested! This would be a fabulous dessert to prepare for any special event or dinner party. Your guests will think you are a master pastry chef who spent days in the kitchen. Here is the recipe:


BASE LAYER:

6 tbsp (3/4 stick) unsalted butter
7 ounces Ghirardelli Bittersweet Chocolate, chopped fine
3/4 tsp. espresso powder
1-1/2 tsp vanilla extract
4 large eggs separated
pinch salt
1/3 cup packed light brown sugar

MIDDLE LAYER:
2 tbsp Dutch-processed cocoa powder
5 tbsp hot water
7 oz Ghirardelli bittersweet chocolate, chopped fine
1-1/2 cups cold heavy cream
1 tbsp sugar
1/8 tsp salt

TOP LAYER:
3/4 tsp powdered gelatin
1 tbsp water
6 oz white Ghirardelli chocolate, chopped fine
1-1/2 cups cold heavy cream
Shaved chocolate for garnish


The Ingredients


THE BASE LAYER: Adjust oven rack to middle position and preheat oven to 325 degrees. Grease bottom and sides of 9-1/2" by 3" spring form pan. Melt the butter, chocolate and espresso powder in large heat proof bowl over a saucepan filled with 1" of barely simmering water. Stir occasionally until smooth. Remove from heat and cool mixture slightly about 5 minutes. Whisk in the vanilla and the egg yolks: set aside.
In the clean bowl of a stand mixer fitted with the whisk attachment, beat the egg whites and salt at medium speed until frothy, about 1 min. Add half of the brown sugar and beat until combined about 15 seconds. Add the remaining brown sugar and beat at high speed until soft peaks form, about 2 minutes, scraping down the sides half way through. Using a whisk, fold one-third of the beaten egg whites into the chocolate mixture. Using a rubber spatula, fold in the remaining whites until no streaks remain. Transfer the batter to the spring form pan, gently smoothing the top with a spatula.

Bake until the cake's center has set but is still soft (it will spring back after pressing gently with your finer ) 13-18 minutes. Transfer the cake to a wire rack to cool completely about 1 hour. Make sure the cake is completely cooled!!! The cake will collapse as it cools. Do not remove cake from the pan!


MIDDLE LAYER: Combine the cocoa powder and hot water in a small bowl; set aside. Melt the chocolate in a large heatproof bowl set over a saucepan filled with 1 inch of barely simmering water, stirring occasionally until smooth. Remove from heat and let cool slightly, 2-5 minutes.

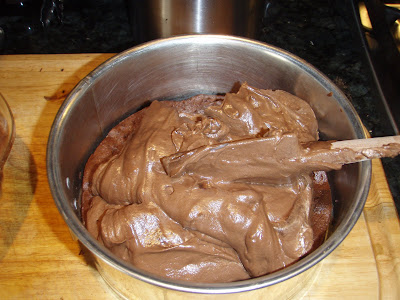
In the clean bowl of a stand mixer fitted with a whisk attachment, whip the cream, sugar and salt at medium speed until it begins to thicken about 1 minute. Increase speed to high and whip until soft peaks form (another couple of minutes). Using a whisk, mix the cocoa powder mixture into the melted chocolate mixture. Using a rubber spatula, fold in the remaining whipped cream until no streaks remain. Spoon Mousse over the cooled cake and gently tap the pan on counter 3 times to remove any large bubbles; gently smooth the top with an offset spatula. Wipe the inside edge with a damp cloth to remove any drips. Refrigerate the cake for at least 15 minutes while preparing the white chocolate layer.
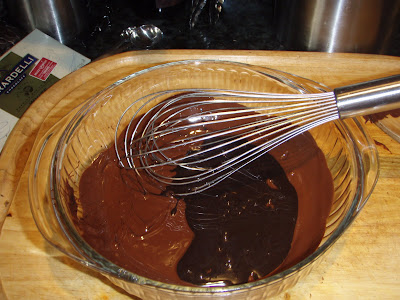

TOP LAYER: In a small bowl, sprinkle the gelatin over the water; let stand at least 5 minutes. Place the white chocolate in a medium bowl. Bring 1/2 cup of the cream to a simmer in a small saucepan over medium heat. Remove from heat add the gelatin mixture and stir until fully dissolved. Pour the cream mixture over the chocolate and whisk until the chocolate is melted and the mixture is smooth about 1 minute. Cool to room temperature, stirring occasionally, 5-8 minutes until thickened.

In a clean bowl of a stand mixture fitted with the whisk attachment, whip the remaining 1 cup of cream at medium speed about 1 minute until it begins to thicken. Increase the speed to high and whip until soft peaks form about 2 minutes. Using a whisk, fold 1/3 of mixture into white chocolate mixture. Using a rubber spatula, fold the remaining whipped cream into the white chocolate mixture until no white streaks remain. Spoon the white chocolate mousse into the pan over the bittersweet chocolate mousse layer. Smooth the top with an offset spatula. Return the cake to the refrigerator and chill until set at least 2-1/2 hours (the cake can be refrigerated up to 1 day). Let stand at room temperature for 45 minutes before releasing from cake pan and serving.


The Finished Product!!

NOTE: when slicing use a hot knife to make a clean cut.

ENJOY THIS FABULOUS DESSERT!!!

Saturday, July 18, 2009

Airbrushing a Wedding Cake ornament


I had a wedding cake client that ordered up a beautiful buttercream layer cake with a silver bow cascading down the front. Traditionally, I hand paint everything that has any kind of edible silver on it. However, this bow was just too big. So, I bit the bullet and purchased an airbrush machine. Much to my husband's dismay I am now hooked. Next up I will probably be trying to spray tan myself and give all the neighborhood kids tatoos!
I researched the various options for an airbrush and they come in all shapes, sizes and price ranges. I found through speaking to a large number of experts and doing some online homework that the KopyKake Brand is really the best choice. I chose the air master model which has adjustable settings for air pressure of 0-30psi giving you greater contgrol over details. Here it is: http://www.kopykake.com/cd_compressors.html The cost is steep ($250) but you will have it for the long term and there are a million things you can do with it.
So, I delivered the cake last Saturday, 7/11 and I already recieved a home visit and beautiful thank you note from the bride and groom. I am very happy with the way it turned out and looking forward to doing some more airbrush work!

Toffee-Tiramisu Layer Cake


My new 2009 Christmas with Southern Living arrived and I quickly devoured it's contents. There were so many delictable choices! I settled up on a cake that had a mix of my favorites: French vanilla cake, heath bar and whipped cream! The recipe is rather simple. A important note however! I also make the cake at day ahead and let it sit in the fridge for at least 24 hours or longer and meld in all the flavors. It is even better! I received RAVE reviews when I served this and will definitely make it again!

Here are the simple steps>
The Cake:
Prep time: 27 min. Cook time: 30 min. Other: 24 hr.
  • Wax Paper
  • 1 18ox pkg French Vanilla cake mix
  • 1 pkg (1.16 oz) Swiss Mocha Cappuccino mix ( I used International foods Suisse Mocha Drink mix)
  • 1/3 cup vegetable oil
  • 3 lg eggs
  • 3/4 cup Cinnamon Espresso Syrup: See recipe below
  • Mascarpone Frosting: See recipe below
  • 3 (1.4 oz) chocolate covered toffee candy bars (i used ALOT more!
  • Garnish: additional chopped toffee or white/dk chocolate shaving
Preheat over to 350. Lightly grease 2 round cake pans. Line with wax paper. Lightly grease wax paper. dust pans with flour, shake off excess and set aside.
Beat cake mix, next 3 ingredients and 1 cup water in a large bowl at low speed with electric mixer 30 seconds then beat for 2 minutes at medium speed. Pour batter into prepared pans.
Bake at 350 for approx 28 minutes or until a wooden pick inserted into cake comes out clean. Let cool in pans on wire racks for 10 min and then remove. Discard was paper and cool layer completely on wire racks for an hour. Wrap and chill layers 1-24 hrs (this step enable you to split layers with ease.
Using a serrated knife, slice layers in half horizontally to make 4 layers. Place 1 layer cut side up on a cake plate. Brush with 1/4 of cinnamon espresso syrup. Spread with 1-1/2 cup of mascarpone frosting. Sprinkle with one fourth chopped chocolate covered toffee pieces. Repeat process with remaining 3 layers, syrup, frosting and chopped candy bar. frost sides of cake with remaining frosting and garnish as desired. Cover and refrigerate overnight. Store in refrigerator. Yields 12 servings:
Cinnamon-Espresso Syrup:

  • 1 cup water
  • 2/3 cup sugar
  • 1 3" cinnamon stick broken in half
  • 1 Tbsp instant espresso powder
  • 1/4 cup coffee liqueur
Bring 1 cup water, sugar, and cinnamon stick to boil in small saucepan. boil 1 minute. Remove from heat and let stand 15 min. Remove and discard cinnamon stick. Stir in espresso powder and liqueur
Mascarpone Frosting:
  • 2 8oz containers of mascarpone cheese
  • 1 cup powdered sugar
  • 2 tsp vanilla extract
  • 1/2 cup cinnamon espresso syrup
  • 2-1/2 cups whipping cream, whipped
Beat first 3 ingredients at low speed with an electric mixer until creamy. Gradually add Cinnamon Espresso syrup, beating until smooth. Fold in whipped cream and cover and chill until ready to use. Yields 8-1/2 cups

French Vanilla Cake Mix
I used 6 heath bars!
Espresso Syrup
Two layer cakes soon to become four
Fill layers with Marscapone Frosting
Refridgerate for at least 24 hours. Slice and Serve.
So Amazing you will LOVE IT!

Monday, July 6, 2009

The BEST Cherry Pie EVER!


I came across an easy and absolutely divine recipe for Cherry Pie that I made yesterday for my Dad (whose favorite pie is cherry). It requires only a few ingredients and is pretty basic, yet it tastes as if you spent hours in the kitchen. So, here is is:

The Ingredients: 6 cups frozen tart or fresh cherries, 2 cups sugar, 6 tablespoons corn starch, 1/4 teaspoon almond extract and your favorite pie crust recipe (double batch for top and bottom).

Mix 2 cups of sugar with 6 tablespoons of corn starch in small bowl


Take the 6 cups of cherries and cook COVERED over low heat until cherries emit their juice. This may take up to 5 minutes


Add the sugar mixture and stir continuously while it thickens.


Once thickened, stir in Almond Extract and remove mixture from heat and allow to cool
Pour cooled mixture into pie dish that has one layer of pie crust placed in in. I used a heart shape cookie cutter to cut out heart shapes to place on the top of the pie as my final layer. I then sprinkled sugar on the top of the crust and placed in oven preheated to 375 degrees and baked for 50 minutes. I would recommend placing the pie on a cookie sheet covered in foil to prevent spills in the oven. I also like to cover the crusts with a layer of foil for the first half of baking to ensure that the crust does not get too brown. This pie is to die for and your friends and family will LOVE it!


Enjoy!!


Wednesday, May 13, 2009

Life is Bumpy

Life is Bumpy. It has it's twists and turns, ups and downs, hills and valleys, laughter and tears. But in the end, it is the journey that makes us who we are. I will never regret any of the bumps along the way, as each one has taught me a lesson about myself and helped me to better understand my destiny and purpose. And it is through each bump I encounter that I am reminded to celebrate my life and all there is to learn about the real meaning of happiness.

Today was a rough day for me. I had a lot on my mind and was having difficulty getting out of my own way. Sometimes the fear takes over, and common sense does not prevail--and in the midst of it all, I find myself heading down the wrong path paved with negativity and self defeat. In those times, I always try to think of things that make me happy, or I go searching for some infinite wisdom outside of myself. Maybe the advice is found in one of my many books or tapes, or sometimes it is via the net (facebook, twitter, a blog) that someone's words resonate with me. Today it was twitter and it was a guy I stumbled across who's name is Charlie. He owns an advertising/marketing firm called Curve Detroit. I have never met him in person, and don't really know much about him. What I can tell you is he taught me a lot today about why life does not have to be bumpy. He posted a video on his blog that spoke to the fact that there are three things that make happiness. First, buy the best mattress you can afford. Second, do something you love for your career. Third, find a mate who "gets you". The video was short, but the message was HUGE. I suddenly realized how easy it really is to stay in a positive space.

Here is what I do know. I have the Sleep Number bed which I love. I have the amazing husband who is my soul mate and loves me just as I am. I also have a great job in advertising and a part time baking business that allows me to indulge in my true passion. It is just that simple......I needed to be reminded I really do have everything I need to be happy and fufilled.

So, to celebrate this new revelation that got me out of my rut, I baked four dozen BUMPY cupcakes. I am going to take them to work tomorrow and share with my co-workers the three simple ingredients of a happy life. Thanks Charlie!!

Here is the link to Charlie's video:

http://vimeo.com/4577848


Sunday, April 5, 2009

In Memory of Ellen


Today, at 10:15am a dear friend and amazing human being, Ellen, lost her courageous battle with cancer.


Ellen was the type of woman who brought an energy to the room that was undeniable. Her spirit was resounding and she would light up a room each time she entered it. She was the most selfless person I have ever met, and despite her many health challenges, she always found time to do things for others.


Her fight was courageous and her spirit contagious. Ellen taught all those around her what the power of postive thinking is. I never once saw Ellen down, or victimized. Instead, she constantly told everyone how blessed she was to be alive.


There are very few people on this planet who can inspire those around them in a way that changes their life forever. Ellen did this for so many.


As Ellen transitioned today, The Lord and Heaven just recruited one of our best. Ellen will be missed in ways that are unimaginable. Not just by her two stoic daughters who have been at her side during this journey, but her loving and supportive husband and all her friends.


There will be a void that will never be filled with Ellen's passing. I will miss her lovely demeanor, her beautiful laugh, her inspiring smile and her amazing insight. I will miss the light in the room that is no longer. My only peace is in knowing that her light has traveled and resides in a place much more grand than this earth......in the hands of God.


I love you Ellen, and will miss you. Please know that I will cherish your memory and live each day to the fullest, knowing that you are watching over us all and continuing your work in Heaven.

The Sweet Taste of Happiness

A Tower of Sweets!
Brownie Truffles-Yummy

I had a magical moment a couple of weeks ago. The kind of moment that reminds me why I love to bake, and how amazing it feels to really do what I feel passionate about.

For those of you who don't know me all that well, baking is my true passion. I have continued to do it part time providing sweet treats for many occassions. Two weeks ago Saturday, I had a wedding cake tasting appointment set up at 1:30pm. I had worked until 2am that morning at my "day job" in advertising, and came home exhausted. Duty called, however, and I had 3 pies to bake and a number of different style of cupcakes to bake and decorate. So, I baked, frosted and set up until 5:30am and hit the hay for a couple of hours so I could get up early and finish up the details. Funny thing is once I started the process not only was I not tired, but full of energy and delight.
So a beautiful bride to be, Morgan, and her very sweet fiance Brett, showed up at my home for the tasting to decide what they wanted for their big day. The theme was Martha Stewart inspired from the February issue. Morgan had given me some leadway to make it my own. I had baked three pies: one Cherry, one apple and one cherry/apple. I also baked 2 dozen mini and standard style red velvet cupcakes and used my creative prowess to come up with some unique decorating ideas. Last but not least I did 2 dozen heart shaped brownies and some brownie truffles. I painstakingly placed all the goodies in a creative display fit for royalty.

So here comes the magical moment.......as the couple stepped into my dining room, the look on their faces was pure joy. The bride gasped in delight and her fiance had a smile that let me know I got the stamp of approval. As they sat down for the tasting, the bride kept commenting on how beautiful everything looked. They started with the mini cupcakes and worked their way into each of the pies. Every bite was met with resounding compliments, oohs and ahhs. As the bride looked over at me, she said, "Bev, not only is this exactly what I wanted, it is far beyond what I could ever have expected." Those are the moments I live for! She went on to explain that the wedding planning process has been painful and a number of her vendors have been unable to come up with anything unique or special. She was so thrilled at the idea that I had not only went above and beyond to meet their expectations, but that my creativity was outstanding. WOW-does that make the lack of sleep, the aching feet and the complete exhaustion worth every moment it took to get there.

The lesson for me: Do what you love and the magnificene will come! I am so honored and thrilled to have the God given talent to be able to bake and decorate these treats, but having a day like today is a reminder of how happy it makes me to bring so much joy to such a magnificent event.


OH HOW SWEET IT IS!!!!!

Cherry Apple Pie
Cherry Pie
Apple Pie